[This post was originally published on 6th April 2021. It has been updated on 30th Aug 2022.]
Whether you are a newbie or an experienced email developer, margin and padding are two terms that you will surely come across every now and then.
Let me take you back to your school days to make things simpler to understand.
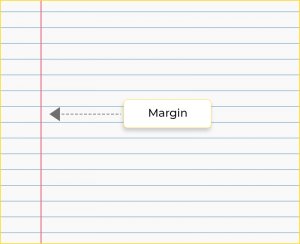
Do you remember that black or red line on the left side of the pages of your notebook? That line represented the margin of the page.

The same concept applies to emails. Besides margin, you have one more thing known as padding in emails. Both these elements form the most important part of the CSS Box Model along with the border and content.

Let’s get to the bottom of these terminologies so that you can employ them more effectively in your emails.
Download A Sample
What are margins in emails?
Margin is a CSS property that refers to the space around the border of an element. In other words, the margin is used to specify the space outside an element.
Take a look at this image:
Here, the element has a margin of 20 pixels.

With the help of margins, you can create negative space between the elements so that the email does not look too cluttered. It will give the reader enough breathing area and make the emails more readable (or easy to scan).

What is padding?
Padding is referred to space within the border of an element. It represents the space in pixels, between the cell wall of the table data, <td>, and the content inside.
While margin is a CSS property, <cellpadding> is an HTML attribute. You cannot override it with the help of any CSS media queries. Therefore, you will not be able to make the emails mobile responsive. It is advisable to take the help of HTML padding when you will not need to alter the spacing according to the different screen sizes.
While padding is used to add spacing in a <td> cell, margin attribute goes well with <div> tags, when you want to add spacing to <div> elements. .
The codes will look something like this.
- For margin attribute: <div style=“margin: 25px;”>
- For HTML padding: <td style=“padding: 25px;”>
Now that we have brushed up on the basics, we shall discuss some tips that will come in handy to create more effective emails with proper spacing.
How to use <td> padding?
If you specify a width property or attribute, <td> padding will not work well. In case you want to add the width of <td> and control it, you can follow the two tips shared below:
- Specify a width on the containing <td>. Next, add a nested <div>, <p>, or <table> but do not specify any width. This will help you to define the margins inside the <td>.
- Create a clear GIF image that is of the same size as the cell within the <td>.
Challenges Posed by Outlook While Using Padding
1. The problem with Outlook is that it does not consider <div> tags and the HTML padding attributes.
As a result, all the HTML padding specifications within those tags will be meaningless. To avoid these mishaps in emails, you must use <table> tags and specify all the spacing dimensions therein.
2. Padding in paragraphs is not compatible with Outlook 2007 and Outlook 2010.
You will have to employ some workarounds to overcome this challenge.
a. You can embed the CSS
This code will add a margin on all sides.
b. Use margin-left, margin-right, and margin-bottom properties for every paragraph.
3. Table element margins and HTML padding are not supported by Outlook 2007 through 2016.
To overcome this issue, you have to place this code:
Usage of Margins
- With the help of CSS margins, you can adjust the position of an element in the email. You can also specify the value of margin as “auto”.
- Set the spacing between two adjacent elements. It will help you apply enough white space between the images of your emails and between the image and text copy.

Note: Negative margin values can be used to overlap page elements only in web designing. Email clients do not support it.
Where to Use Padding
- CSS padding will allow you to add negative space inside the elements.

- You can also use it to alter the size of the element. If you want to add more spacing around the CTA copy, you can use padding. This will allow you to create a bigger CTA that is easily tappable. The same applies to other clickable buttons of your emails.
Other Ways to Add Spacing in HTML Email Templates
- Use the <br> tag
If you are looking for an easy way to add spacing in your emails, the <br> tag will do the trick for you. It will apply line breaks to the email copy.
However, the problem with this technique is that line breaks will be rendered differently in all email clients. If you are looking for pixel-perfect spacing in your email, using line breaks will not be a good idea.
- Take the help of empty <td>
Previously, email developers used to add empty <td> cells to increase the spacing around the content. With the advent of mobile responsiveness, this method got obsolete as it does not work for responsive emails.
Importance of Email Testing
As email clients like Outlook render padding and margins differently, you must always test your emails. Use email testing tools like Litmus or Email on Acid to be doubly sure that your emails are rendering well across all email clients and devices.
In case you still feel stuck or are unable to create flawless emails, just get in touch with our experts. We would love to help you out.
After all, Google might not have answers to all your coding woes.
Wrapping It Up
Nowadays, email service providers come with drag and drop editors which have made things easy for email marketers and developers. Nonetheless, there are still times when you would want to send a customized email created from scratch. In such cases, you must be familiar with all these tips and tricks. We hope the next time you have to add padding and specify HTML table margins, this article comes handy!
In any case, Email Uplers has your back and would love to assist you.


Kevin George
Latest posts by Kevin George (see all)
How to Establish the Optimum Email Marketing Cadence (With a Practical Example)
A Useful Guide to Using Behavioral Triggers in Salesforce Marketing Cloud